Tuesday, January 31, 2012

Outside The Box


 I hate to throw things away before trying to think of how to reuse them. Take for example this box. I bought a new cash box to keep change in and was getting ready to throw the box it came in out, but decided not to. Its a thick sturdy cardboard so I decided to keep it. I was looking for something to keep receipts and loose papers in anyway. Of course the boxes advertising wasn't exactly attractive, so I remedied that. Its a bit loud, I know, but I made it from what I had. Better than nothing I say. :)


Sunday, January 29, 2012

Second Hand Sconce


Found this sconce at a thrift store the other day. It has a distressed antique bronze finish. The lamp shade on the other hand, was too simple and plain. I could have bought a new shade, but would have spent the same or more than I did for the fixture itself ($5). So I had some leftover scrapbook paper and decided to just work with what I had. It turned out nice, but unfortunately some of the paper was too thick and just leaves a silhouette rather than showing through when the light is on. Note to self, Only use very thin paper for lamp shades.

I took photos of every side so you can see the whole design. The first layer is actually a very delicate handmade paper with a pattern the looks like writing printed on it. The light shows through it fine and the details show up great. The only issue I had with it was that the decoupage glue tended to turn it yellow in places, which was ok because it gave it an aged look than went with the rest of it.

The other parts are a standard thickness scrapbook paper that is pretty much too thick for this application. It works fine for most surfaces, but is no good for use on shades or anything that has light showing through it, like a window, unless you specifically want to do silhouettes.


All in all, it turned it nice and only took about an hour and a half to complete.

Friday, January 27, 2012

Decoupage Table

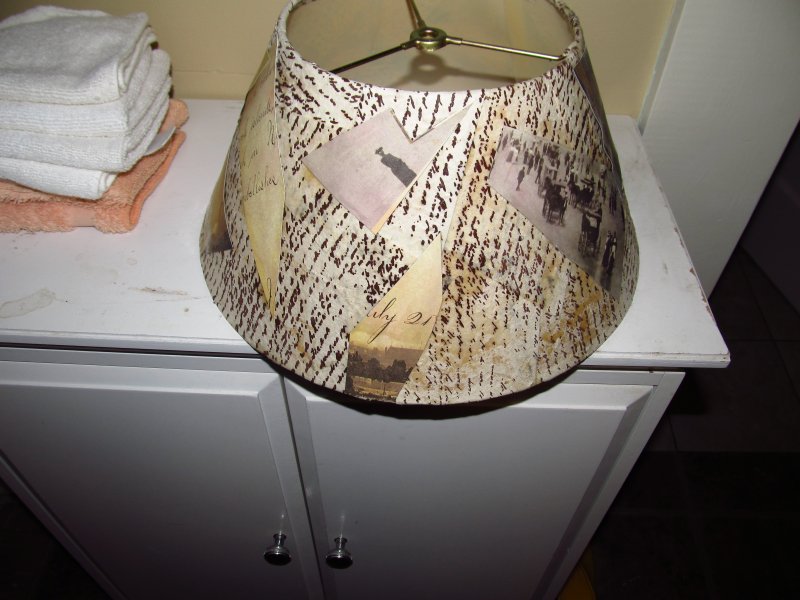
So I decided to decoupage a side table that I've had for a while. Originally it was very plain, a simple wood table with maple finish. It didn't work with any decor. So after some consideration, I picked a travel theme for it. The materials used came from two sources, Scrapbook paper from Michaels craft store and various pics from a travel magazine. I finished off the table by painting the legs and lower shelf a color called Java Brown in Satin. I forgot to take a "before" photo of it, but heres the result.

I spent about two hours on the decoupage, though the paint took longer because it needed three coats. I sanded the table before starting, which saved me a lot of heartache.

The last step is to apply two coats of poly to the top. This will give it a nice hard protective finish.

The hardest, but also most fun part of this project was picking the materials and deciding on a design. I didn't lay it out first. I started on one corner and worked the design out as I went.

Sunday, January 22, 2012

Screen Door Reconditioning

The screen door to my laundry room has been an eye sore for several years now. The previous owners had done various modifications to it and then someone had knocked holes in the screen. It still had its original spring hinges, which were a real pain when trying to bring loads of clothes in and out of the room. I always ended up wedging something in it to hold it open. Another issue was wind. The windows in the room need to be replaced and if the wind blew a certain way, it would blow the door open and then slam it since there was no latch on it. So, I decided to remedy these issues.

The first step was to carefully remove the molding around the screen. This is simple, since its just held by tiny finish nails. After removing the moldings, I then took all the old screen off and threw it away. If I had more time I would have then removed all the nails and staples, but since I only had a few hours I just used a hammer and knocked them all in flush with the wood. I then took a new roll of window screen and rescreened it, being sure to hold the screen tight as I stapled it in place. A pair of scissors easily cut the material to size. I then reinstalled the molding using new 3/4" finish nails.

The next step was to repaint the door. Normally I would have done this before putting the new screen on, but because the screen was grey rather than black, I painted it all together.

Next I removed the old spring hinges and replaced them with a dark bronze finish hinges. These look better with the door and allow it to stand open.

I next installed a gate latch, so that the door wouldn't open on its own from the wind. It opens just like a gate and then you just push it closed and it latches itself back.

And there you have it. Just a couple of hours work and this door is like new again.

Thursday, January 19, 2012

Drab to Fab

We see them every day. Lamps that are old, out dated, or just plain ugly. Most of the time they are merely thrown away or sold at the next yard sale. But I say theres life still left in them. Take this lamp for example. It was a dark wood and all around boring. The only decor it fit was a lake cabin. But with a little bit of help it has begun a new life.

A little paint go's a long way.. In this case I had originally planned to go with a white and blue two tone. The base was going to be blue, as well as the top section of the lamp, with the rest being white. The color scheme was chosen because of the rather unique world map lamp shade that it had.

I first taped off the lamps cord and bulb socket with painters tape. Then I spray painted the entire lamp white. After a drying time of about an hour, I taped off the sections to be painted blue. After applying Krylon True Blue, I allowed it time to dry and then removed the tape. Unfortunately, the tape pulled off some of the white paint in the process. I'm not sure if I just didn't wait long enough for the paint to dry originally (One hour), or if the paint just wasn't adhering well. I would have normally sanded the surface first, but since it was ruff wood I skipped that step. In any case, I decided to go ahead and paint the entire lamp blue, which turned out to be a good choice.


Though the shade wasn't my first choice, the new color makes it look a whole lot more interesting and decorative.